
Triptych Wall Art From Photo Canvas
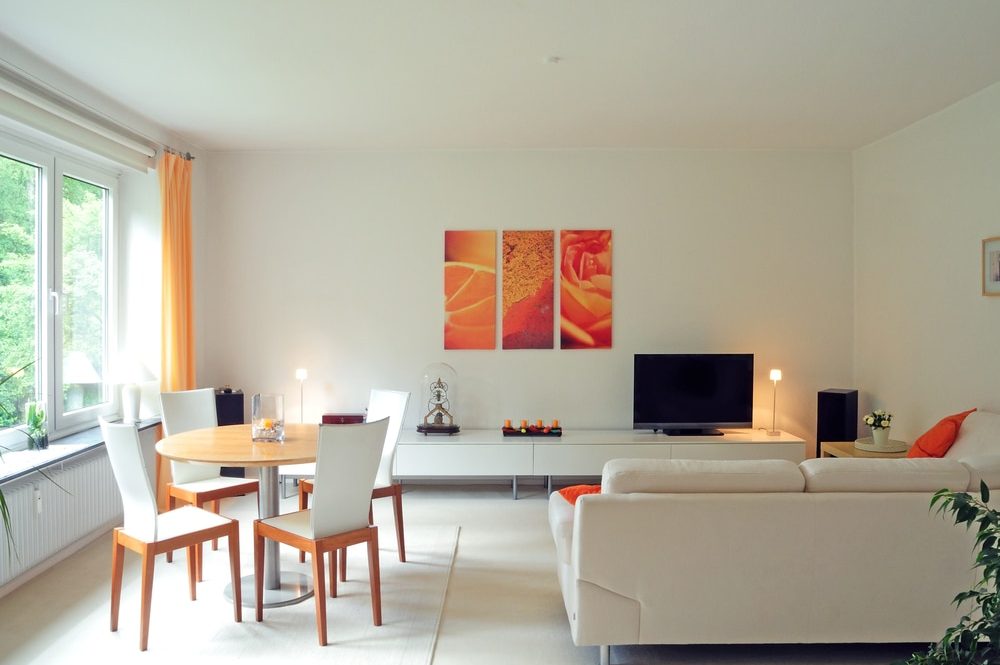
I recently had the pleasure of working with designer Kobby Akuffo to make a large triptych (pronounced as trip-tik) wall art for a doctor’s office. Making a photo canvas is not new to me, but making a triptych is. I learned a lot during the process, and can’t wait to share some tips with you because a triptych is, simply put, stunning.
A triptych consists of three different images that are related in some way. It can be a single image divided into three panels, or three different images of the same topic from a different viewpoint. Each image is made of the same size and medium, so the group tells a better story than a single image. Human eyes are more attracted to an odd number of objects, so a 3-image grouping is more effective than 2 or 4. In this article, I’ll discuss a few things to consider when making and putting up triptych wall art.
How big is the wall?
The first thing my designer did was measure the wall to be decorated. It was 15’ long and 8’ tall. After comparing a few blank canvases, we decided on the “20×30”.
What’s the color theme?
When I showed my images to the designer, he quickly passed on my favorite ones and instead, picked those I had ignored. The reason? Images should have at least one or two colors that can be found in the rest of the environment. The wall was a pastel green, and there was already a piece of metal wall art with deep red and dark green colors. To make the space look unified, we chose photos with either deep red, dark green, or both. With this in mind, a series of my sunset photos was a good choice.
You probably can argue “I don’t care about the color theme, I just like to show off my favorite photos.” “I want the colors of the photos to pop.” Well, it’s your space and you have the final call in what you put on your walls. Most often, though, we want harmonious space, and keeping the colors consistent can contribute to an impression of unity.
What kind of environment?
As for the subject of your image, you must consider the function of the space and the effect of your decoration. We don’t want to steer away from anyone at the doctor’s office, so we stayed away from images with people in it. Nature photos bring the outside in and have a calming effect. Most people like the beauty of a sunset; it is relaxing to look at, making it a perfect subject for patients to view when entering the waiting area. If decorating a child’s room, you may consider photos of things your kid loves, his toys, abstract images that can stimulate his or her imagination, such as giant bubbles, kites, sandcastles, etc.
Picking the right gathering of images
When choosing different photos of the same subject, they need to be different but still related somehow. Some examples include taking images from different angles or with a different perspective. It could also be photos of the same subject taken at different times. For example, my sunset photos were taken minutes apart. They were a long shot of the sun over the open water; a silhouette of a stone sculpture nearby; and a close-up of it. Photos were taken at different focal lengths from a nice series, such as a forest, a tree, its branches, and close-up blossom.
If you choose to divide a single image, pick landscape orientation, and ensure each panel has its own point of interest.
The thickness of the canvas
Canvas frames typically range from 3/4 of an inch up to 2” thick. You may like the gallery look of a thicker framed canvas, but certain factors can affect your decision. If it’s a narrow space (corridor), you want to go with a thinner canvas to avoid accidental brushing by the passers-by. Another thing to consider is how much weight the wall can hold if your chosen location doesn’t have studs in just the right spots.
What goes onto the canvas edges?
There are four options: wrapped image, mirror image, black or white. Black or white edges are self-explanatory. The wrapped image literally wraps the edges of the image around the frame. This can cause a loss of viewable content of 1-3”, so be sure to line up the image right, and set your bleeds and borders for which parts of the image you want to make sure don’t get wrapped around a corner. If you choose a mirror image, the whole picture will appear on the front of the canvas and few inches of the outer edge portion will be “mirrored” around the frame. Simply choose which edge option you’d like when ordering your gallery-wrapped canvas.
Prepare print file
Look up the resolution requirement at your printer’s website, resize your image larger to ensure great print quality. Also, remember that a canvas has a unique texture that could lend itself well to enhancing your imagery. For example, if your image is of a low resolution that is fuzzy – but not pixelated – when you blow it up to the size you want to print it, it still could look good, though it may look more like a painting than a photograph. Additionally, you may want to add an extra texture to your photograph or image to make the most of the canvas’s special properties.
Variation
I’ve seen a visually compelling triptych with three panels at different widths. They are not randomly arranged, usually getting wider in one direction or with a larger image at the center with two smaller images on either side.
That’s pretty much all you need to know to make a beautiful triptych photo canvas. I hope this article will entice you to create one on your own.